Low-light photography on a mobile phone is a challenge, almost by definition. It is an art that can test the limits of even the best cameras and the most experienced photographers. When it comes to smartphone cameras, the challenges can be even greater.
Despite the limitations of smaller sensors and fixed apertures, smartphones have made impressive advancements in their low-light capabilities, allowing photographers to capture beautiful, well-exposed images in less-than-ideal lighting conditions… But… You need to know how to achieve these results as they don’t just happen by pointing and shooting. Let’s find out, in this step-by-step guide to low light mobile phone photography, how you can achieve remarkable low-light and night photographs with your mobile smartphone camera. As a bonus, we also examine the best low light photography phones.
In this comprehensive guide, we will delve into the key principles, techniques, and tools that can help you overcome the obstacles of low-light photography and unlock your smartphone’s true potential. From understanding the technical aspects and camera settings to post-processing, this step-by-step guide will equip you with the knowledge and skills needed to excel in the captivating world of low-light smartphone photography.
Table of Contents
Challenges in Low Light Photography:
The main challenge of low-light photography is the lack of light, the raw material of photography itself. This means that we have to maximize all the settings which allow us to capture more light with the camera. a) large aperture b) long shutter speed and c) high ISO. When these don’t work out, it can result in blurred images, increased noise, and poor color reproduction.
Smartphone cameras generally have smaller sensors than DSLRs, which makes them even more susceptible to these issues. To overcome these challenges, you need to optimize your camera settings, utilize camera features, and adopt specific shooting techniques. We’ll discuss them at length now…
1. Choosing the Right Mobile Phone Camera Settings for Low Light:
- Set your ISO to the lowest possible value that still provides a well-exposed image. Higher ISO values can result in more noise, so use them sparingly. It’s ok for your images to look dark. After all, this is a low-light situation. We just need to represent it accurately.
- Use a slower shutter speed along with a tripod, to allow more light into the camera sensor. Be aware that slower shutter speeds can cause motion blur, so a tripod or stabilizer might be necessary. We will talk about the options that you have on this front shortly.
- Experiment with manual focus, as autofocus can struggle in low-light conditions. Tap on the area of the screen where you want to focus, or use manual focus mode if your smartphone supports it. Lock your focus on this spot, if you can. This will help to minimize your frustration at getting soft photographs and not knowing why.
2. Using Mobile Phone Camera Features like Night Mode:
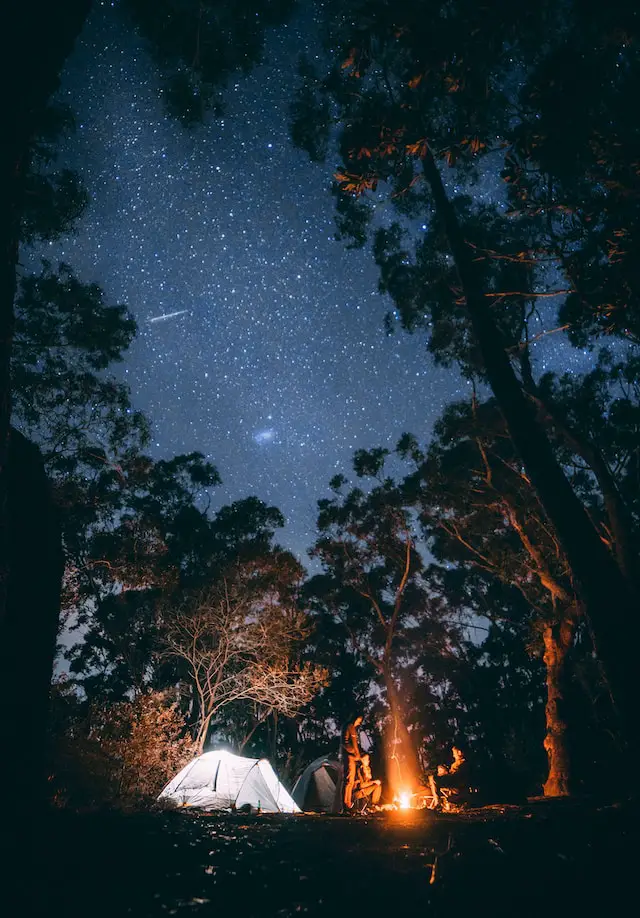
Many smartphones now come equipped with a Night Mode feature, which combines multiple images taken at different exposures to create a single, well-exposed image. One of the challenges of shooting long exposures is having more detail in shadow areas, but having brightly lit areas completely whitened out.
This feature can significantly improve the quality of your low-light photos by combining various exposure levels seamlessly like HDR mode, but optimized for low-light situations. Be sure to enable Night Mode or any similar feature in your smartphone camera app when shooting in low-light conditions. Some manufacturers don’t optimize this mode for the particular camera on the smartphone, so it doesn’t always give great results. Give your camera a try and see whether Night Mode works better than regular mode.
3. Tripods and Gimbals for Low Light Photography:
When shooting with long exposure times, either the camera or the subject in the frame might move. While you have little to no control over the subject, you can control the movement of your camera. To minimize motion blur originating from camera shake in low-light situations, consider using a tripod or smartphone stabilizer (gimbal). These accessories help steady your phone, allowing you to use slower shutter speeds without introducing camera shake. I highly recommend a sturdy tripod. The lighter the tripod is, the more susceptible to shake it will be.
There are many affordable and portable tripod options available, making them a worthwhile investment for smartphone photographers who are serious about night time photography, or long exposure photography with their phones.
As a last resort, if you don’t have a tripod on hand and you want to take a photo with your camera phone, just look out for some spot to prop up it up so that you’re not holding it. This way, the minute shake from your hand doesn’t affect your long exposure pictures.
Composition and Framing Techniques for a Low Light Subject:
- Look for sources of light to create contrast and depth in your images, such as streetlights or illuminated windows.
- Use silhouettes to add drama and mystery to your low-light photos.
- Experiment with long-exposure photography to capture light trails or star trails.
- Remember the rule of thirds to create balanced and visually appealing compositions.
How Mobile Phones Handle Low Light Differently from Full-Frame Sensors and APS-C Cameras:
Smartphone cameras have come a long way in recent years, but they still have some inherent limitations compared to full-frame and APS-C cameras when it comes to low-light photography. Here are some key differences in how mobile phones handle low light compared to their larger-sensor counterparts:
1. Sensor Size:
The most significant difference between mobile phones and full-frame or APS-C cameras is the sensor size. Smartphone cameras have much smaller sensors, which means that they have less surface area to capture light. Smaller sensors result in reduced light-gathering capabilities and lower dynamic range, making them more prone to noise, especially in low-light situations. On the other hand, full-frame and APS-C cameras have larger sensors, enabling them to gather more light and produce better image quality, even in challenging lighting conditions. However, smartphones compete by using optimized computational photography and smart noise reduction algorithms built into the phone’s software. A famous example of this is Google’s Pixel mobile phones.
2. Lens Aperture:
Another critical factor affecting low light performance is the lens’s aperture size. Smartphone cameras usually have fixed-aperture lenses with a relatively wide maximum aperture, allowing them to capture more light. However, these apertures are still generally smaller than those found on full-frame or APS-C cameras with interchangeable lenses. This simply comes down to the larger size of the camera and lenses, once again. Larger apertures on these cameras enable more light to enter the sensor, resulting in better low-light performance and less noise. There isn’t much that one can do on this front for Smartphone cameras.
3. Noise Reduction Algorithms:
Smartphone cameras heavily rely on computational photography and noise reduction algorithms to improve low-light performance. These algorithms work by analyzing and processing image data to reduce noise and enhance details. While this approach can yield impressive results, it may sometimes lead to artifacts and a loss of fine detail. Full-frame and APS-C cameras, on the other hand, can produce cleaner images with less noise straight from the sensor, often requiring less aggressive noise reduction. Computational photography and ML algorithms aren’t generally used in these larger cameras as photographers prefer to do this processing themselves, but this is changing as the technology gets better, more realistic, and more reliable.
4. Image Stabilization:
Many smartphones now feature some form of image stabilization, either optical (OIS) or electronic (EIS), to help reduce camera shake and blur in low light situations. While this can help achieve sharper images at slower shutter speeds, it may not be as effective as the in-body image stabilization (IBIS) found in some full-frame and APS-C cameras. IBIS can compensate for camera shake across multiple axes, allowing for even slower shutter speeds and improved low light performance. The size and weight of the cameras also comes into play, with smartphones being light, and as a result, more prone to minor shake. When cameras are held up to the eye, there is one more surface to stabilize the camera (the photographer’s face), and this makes things even more stable.
5. High ISO Performance:
Smartphone cameras generally have more limited ISO ranges compared to full-frame and APS-C cameras. As a result, they may struggle to maintain image quality at higher ISO values. Full-frame and APS-C cameras often have better high ISO performance, enabling them to capture cleaner images with less noise in low-light situations. This performance difference once again boils down to the larger size of sensors on conventional and mirrorless cameras when compared to smartphones.
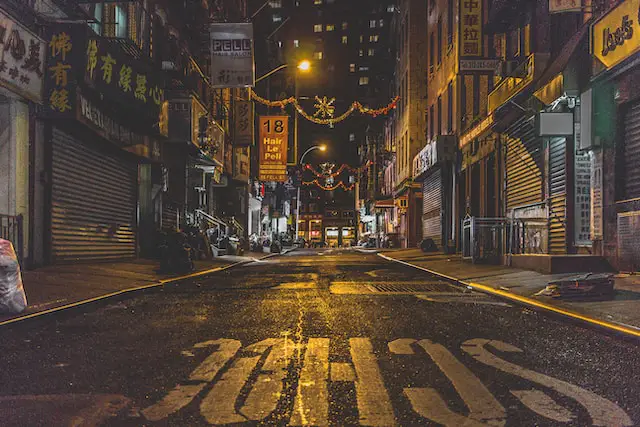
So, even though smartphones have made huge strides in low light photography, they still face limitations compared to full-frame and APS-C cameras, when similar techniques are used. Understanding these differences will help you make the most of your smartphone camera in low light situations and appreciate the advantages that larger-sensor cameras can offer in these conditions.
But don’t be disheartened, just because they’re not as good as large sensor cameras doesn’t mean that smartphone cameras are bad. In fact, they have never been as good as they are today, and the images that they produce can be really impressive.
Get More Light!
Not enough light? Add more light to your scene. Today photographers are spoilt for choice when it comes to picking portable rechargeable lights which are designed for a number of photographic scenarios… from continuous light, to flash, and even strobe effects and colors, we have never had as many choices as we do today. So grab a light or two from Aputure, Godox, or whichever your favorite brand is, and add more light to your scene…
Creative Low Light Photography Using Time
With having to use longer exposure times, we get access to new creative tools. We get to see the movement of light in ways that aren’t possible during brightly sun-lit times.
Use slow shutter speeds to see objects blurring, for example: show a vehicle moving against a still background as light streaks, the movement of trees against the sky, or waves on a seashore. With a tripod, as mentioned before, you can create images that show the passage of time through the blurring or streaking of moving objects in your images.
Post-processing Tips for Enhancing Low Light Images:
Editing your low light photos can help reduce noise, enhance colors, and improve overall image quality. Some popular editing apps like Snapseed, Adobe Lightroom, and VSCO offer noise reduction and other features tailored for low-light images. There are also dedicated noise reduction plugins that use AI-based ML algorithms to drastically reduce noise while retaining detail in the image.
However, I think that for most people this is excessive. Instead, I encourage you to play with the exposure, contrast, and color settings to achieve your desired look, and don’t forget to save your edits as a preset for future use.
Inspirational Examples of Smartphone Low Light Photography:
To get inspired and learn from others, follow mobile photographers on social media platforms like Instagram, and search for hashtags like #lowlightphotography, #nightphotography, or #mobilephotography. Study their techniques and compositions to gain insights into how they capture captivating low-light images using their smartphones.
So, What Is The Best Mobile Phone For Low Light Photography?
A smartphone camera’s not the the best at capturing light because of their small sensors and lenses, and how little light they can capture. However, they are ‘smart’, and they use advanced computational photography, HDR, and Noise reduction algorithms to make night and low-light photographs look better than they should. There are a few technologies and tools that you can use to improve your low-light photography, like using supports, using manual controls, and post-processing to remove or reduce noise. The best way to learn what works is to try, fail, and try again until you succeed.
Selected Low Light Camera Phones
That said, there are some mobile phones that stand out from the crowd when it comes to low light performance.
- Huawei P60 Pro
- Google Pixel 7 Pro
- Apple iPhone 14 Pro
- Oppo Find X6 Pro
Low light photography with mobile phones isn’t about recording facts as much as it is about being creative and exploring light in ways that you can’t when the sun is shining brightly. Embrace that mentality and creative challenge and roll with it. If not, carry your own lights, and improve the lighting available to you.
Wrapping Up
With practice and the right approach, you can master low light photography with your smartphone. By understanding your camera’s settings, utilizing features like Night Mode, and employing creative composition techniques, you’ll be able to capture stunning images, even in challenging low light conditions. Keep experimenting and refining your skills, and you’ll be amazed at the photos you can create using just your smartphone.
